> ## Documentation Index
> Fetch the complete documentation index at: https://docs.iroh.computer/llms.txt
> Use this file to discover all available pages before exploring further.
# Managed Hosting
> Deploy and configure dedicated relay infrastructure through Iroh Services
Managed relays are dedicated relay servers provisioned through the Iroh Services platform and operated by n0.computer. Unlike the [public relays](/iroh-services/relays/public), managed relays are exclusively yours: authenticated by default, no shared traffic, no rate limits, and with uptime SLAs.
## What you get
* **Fully managed**: n0.computer handles operations, maintenance, and upgrades
* **Authenticated by default**: only your project's endpoints can connect, authenticated automatically with your API key
* **Isolation**: your traffic only; no noisy neighbors
* **Version locking**: pin to a specific iroh version or run blue/green deployments
* **Multi-region & multi-cloud**: deploy across regions and providers for resilience
* **On-prem**: available on Enterprise plans; [contact us](mailto:support@iroh.computer)
* **Custom SLAs**: [contact us](mailto:support@iroh.computer)
## Deploy a relay
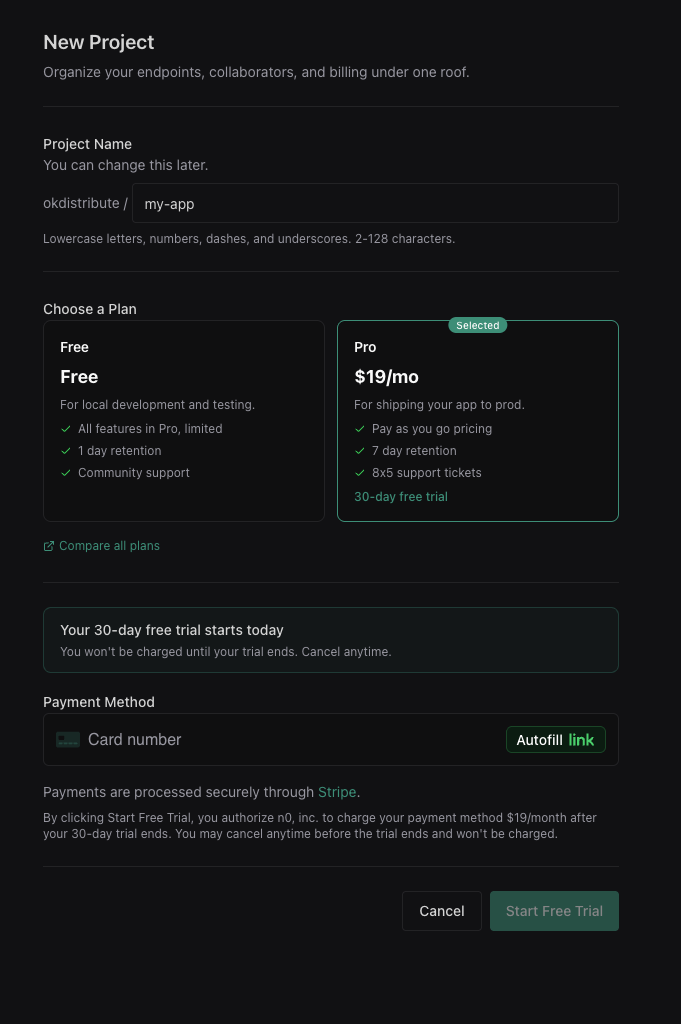
### 1. Sign up and create a Pro project
Sign up at [services.iroh.computer](https://services.iroh.computer?utm_source=docs\&utm_content=managed-relays) and create a project if you haven't already.
The project must be on the Pro plan to deploy managed relays. You can also upgrade your project to Pro in the billing settings.
 ### 2. Add a relay
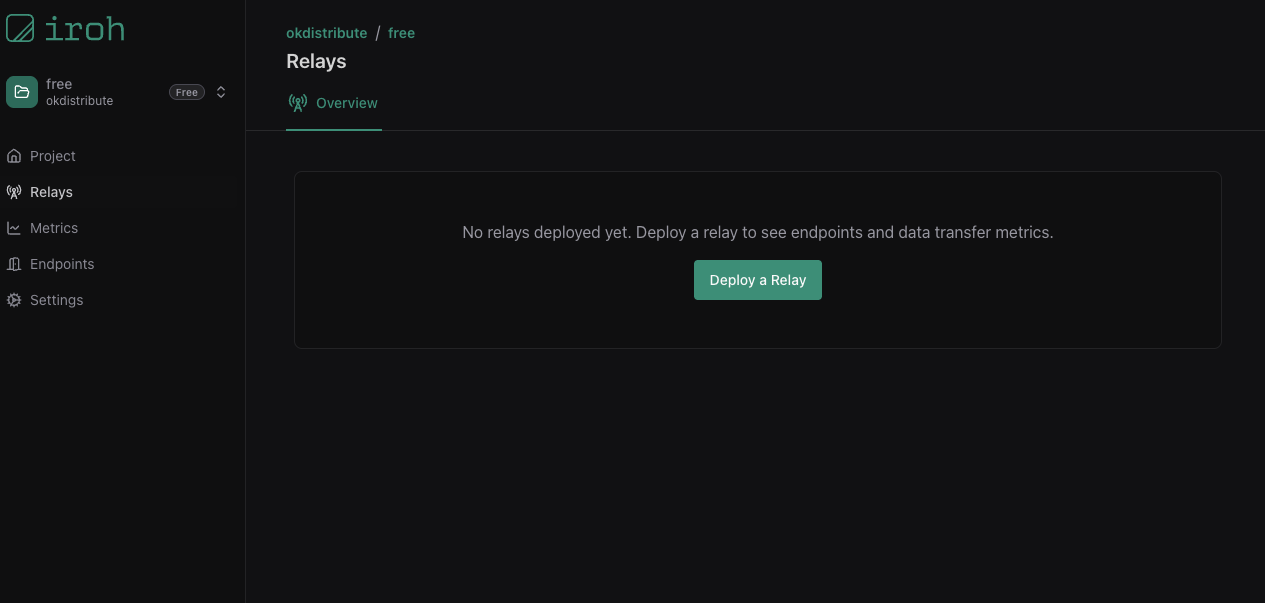
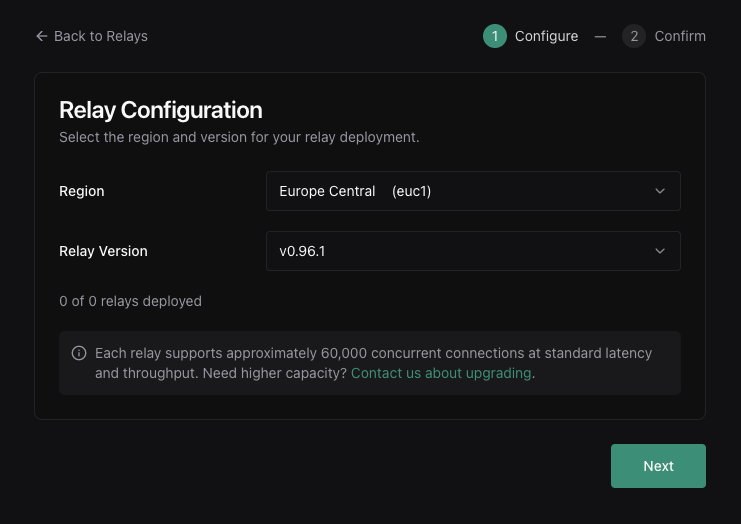
Navigate to **Relays** in your project sidebar and click **Deploy Relay**. Select a region for your relay.
### 2. Add a relay
Navigate to **Relays** in your project sidebar and click **Deploy Relay**. Select a region for your relay.
 ### 3. Copy your relay URL
Once deployed, your relay URL will appear in the dashboard. Copy it; you'll need it to configure your endpoints.
### 4. Configure your endpoint
Set your endpoint to use your dedicated relay URLs instead of the public relays:
Your dedicated relays require authentication by default. Your endpoint
authenticates to them with your project's API key. The `iroh_services::preset()` builder handles
this for you: it mints a short-lived access token scoped to your endpoint's key
and configures the endpoint to use your relays.
Add the `iroh-services` crate to your project:
```bash theme={null}
cargo add iroh-services
```
Then build a preset and bind your endpoint with it:
```rust theme={null}
use iroh::Endpoint;
#[tokio::main]
async fn main() -> anyhow::Result<()> {
// Build a preset pointing at your dedicated relays, authenticated with
// your project's API key. In production, load the key from a config file
// or environment variable instead of hardcoding it.
let preset = iroh_services::preset()
.relays([
"YOUR_RELAY_URL_US",
"YOUR_RELAY_URL_EU",
])?
.api_secret_from_str("YOUR_API_KEY")?
.build()?;
// Bind the endpoint with the preset, then wait until it's online to
// confirm it has an authorized connection to a relay.
let endpoint = Endpoint::bind(preset).await?;
endpoint.online().await;
Ok(())
}
```
Custom relay URLs are available on Pro and Enterprise projects. On a free project, pass your API key to the preset without `relays(...)` to authenticate against the public relays and surface your relay traffic on the dashboard.
### 5. Verify connectivity
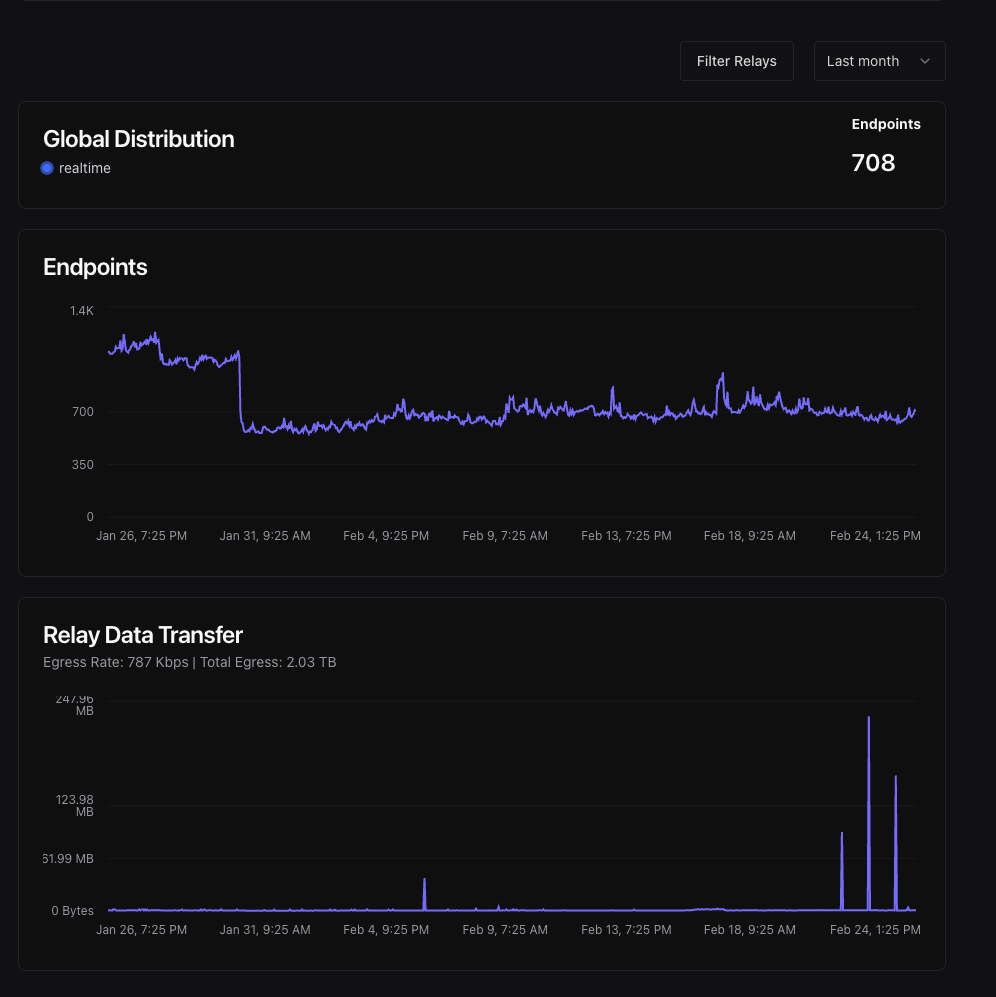
Go to your project's **Relays** page to confirm your endpoints are connecting through your dedicated relay. You should see connected endpoint counts and traffic metrics.
### 3. Copy your relay URL
Once deployed, your relay URL will appear in the dashboard. Copy it; you'll need it to configure your endpoints.
### 4. Configure your endpoint
Set your endpoint to use your dedicated relay URLs instead of the public relays:
Your dedicated relays require authentication by default. Your endpoint
authenticates to them with your project's API key. The `iroh_services::preset()` builder handles
this for you: it mints a short-lived access token scoped to your endpoint's key
and configures the endpoint to use your relays.
Add the `iroh-services` crate to your project:
```bash theme={null}
cargo add iroh-services
```
Then build a preset and bind your endpoint with it:
```rust theme={null}
use iroh::Endpoint;
#[tokio::main]
async fn main() -> anyhow::Result<()> {
// Build a preset pointing at your dedicated relays, authenticated with
// your project's API key. In production, load the key from a config file
// or environment variable instead of hardcoding it.
let preset = iroh_services::preset()
.relays([
"YOUR_RELAY_URL_US",
"YOUR_RELAY_URL_EU",
])?
.api_secret_from_str("YOUR_API_KEY")?
.build()?;
// Bind the endpoint with the preset, then wait until it's online to
// confirm it has an authorized connection to a relay.
let endpoint = Endpoint::bind(preset).await?;
endpoint.online().await;
Ok(())
}
```
Custom relay URLs are available on Pro and Enterprise projects. On a free project, pass your API key to the preset without `relays(...)` to authenticate against the public relays and surface your relay traffic on the dashboard.
### 5. Verify connectivity
Go to your project's **Relays** page to confirm your endpoints are connecting through your dedicated relay. You should see connected endpoint counts and traffic metrics.
 ## Authentication
Managed relays **require authentication by default** — only your project's endpoints can connect. There's nothing extra to set up: when you build your endpoint with the [`preset()`](#4-configure-your-endpoint) and your API key, it authenticates automatically. For how this works under the hood, see [relay authentication](/concepts/relays#authentication).
## Turn authentication off
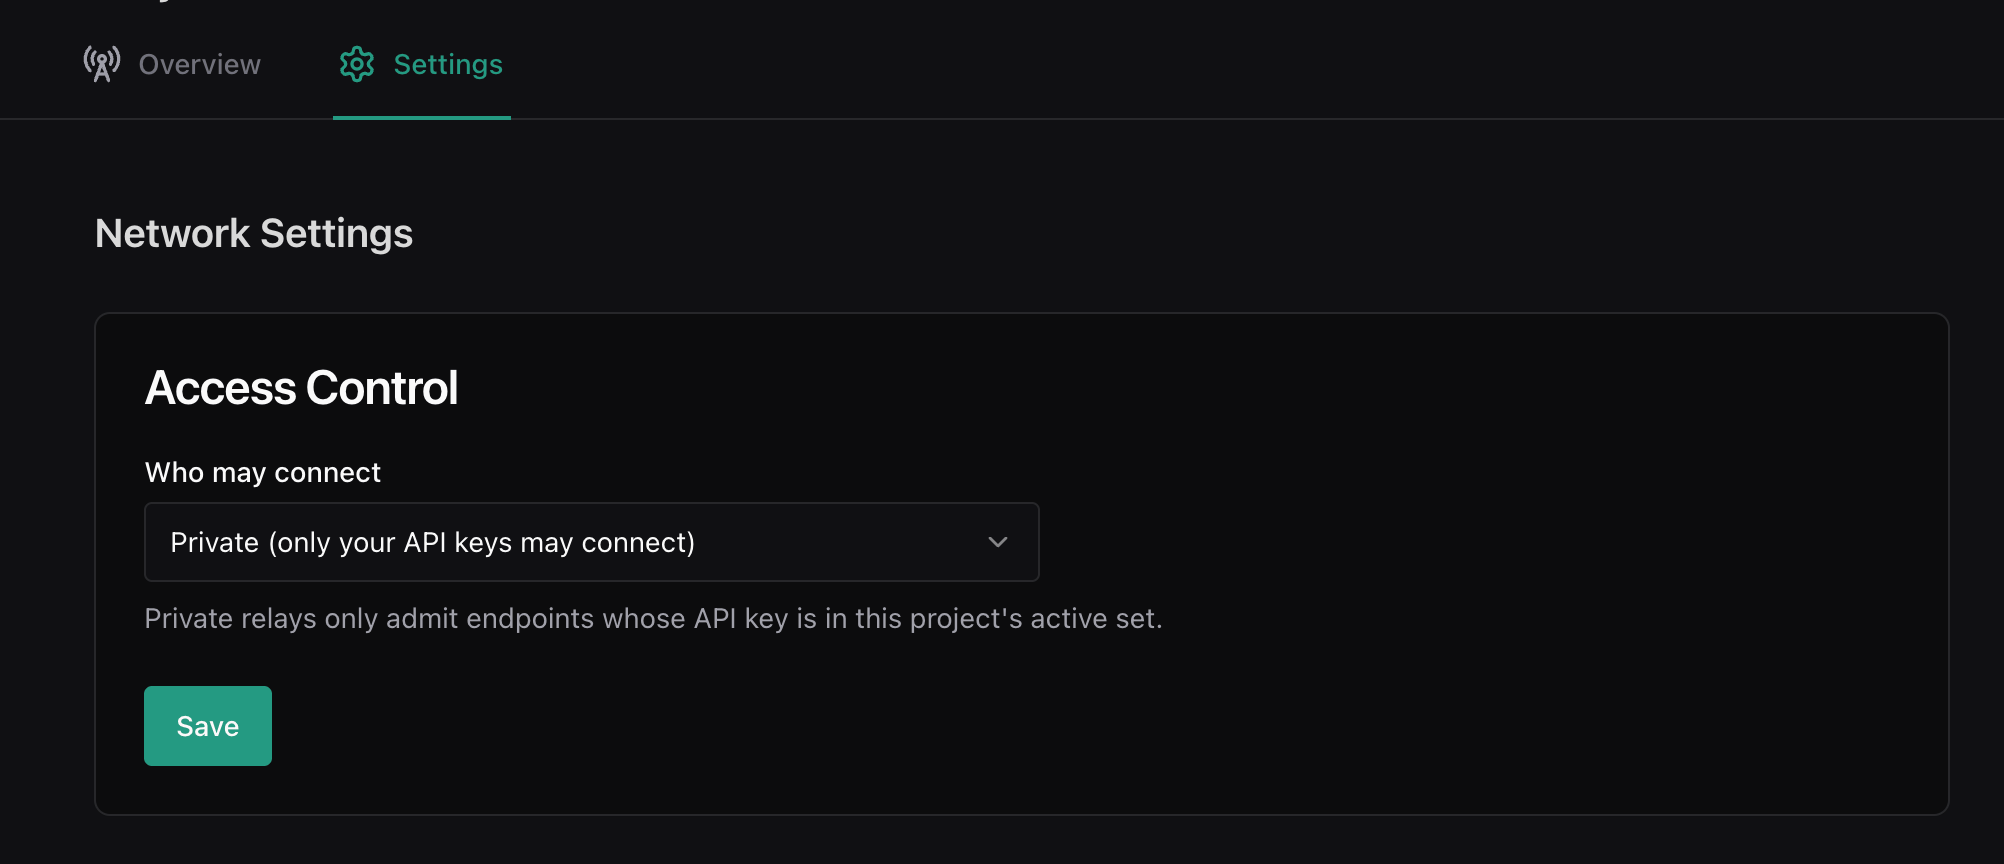
If you want any endpoint that has your relay's URL to be able to use it — not
just your project's endpoints — you can turn authentication off in your relay's
**Settings → Network Settings → Access Control**. Use the **Who may connect**
dropdown, then **Save**.
In the dashboard this control is labeled **Private** (authentication on — only
your project's API keys may connect) and **Public** (authentication off).
"Public" here means no API key is required to connect; it does not make your
relay discoverable.
## Authentication
Managed relays **require authentication by default** — only your project's endpoints can connect. There's nothing extra to set up: when you build your endpoint with the [`preset()`](#4-configure-your-endpoint) and your API key, it authenticates automatically. For how this works under the hood, see [relay authentication](/concepts/relays#authentication).
## Turn authentication off
If you want any endpoint that has your relay's URL to be able to use it — not
just your project's endpoints — you can turn authentication off in your relay's
**Settings → Network Settings → Access Control**. Use the **Who may connect**
dropdown, then **Save**.
In the dashboard this control is labeled **Private** (authentication on — only
your project's API keys may connect) and **Public** (authentication off).
"Public" here means no API key is required to connect; it does not make your
relay discoverable.
 Turning authentication off doesn't list or advertise your relay anywhere; an
endpoint still has to know the URL to use it. The relay also keeps reporting its
traffic and metrics to your dashboard either way.
Be careful turning authentication off: any iroh endpoint that learns the URL can
then use the relay, so it may be subject to abuse. We recommend keeping
authentication on for production deployments and only turning it off for testing
or development.
Public relays still report their traffic and metrics to your dashboard; they
just don't require your API key to connect.
## Recommended setup
For production, deploy at least two relays in different geographic regions. If one relay becomes unreachable, iroh automatically falls back to the next one in your list, so your peers will still find each other.
Each relay handles up to 60,000 concurrent connections. For larger deployments, [contact us](mailto:support@iroh.computer) to increase relay capacity.
## Support
Relay status and metrics are available in your project dashboard under **Relays**. On the Pro plan, we offer priority support. [Contact us](mailto:support@iroh.computer) for Enterprise SLAs.
Turning authentication off doesn't list or advertise your relay anywhere; an
endpoint still has to know the URL to use it. The relay also keeps reporting its
traffic and metrics to your dashboard either way.
Be careful turning authentication off: any iroh endpoint that learns the URL can
then use the relay, so it may be subject to abuse. We recommend keeping
authentication on for production deployments and only turning it off for testing
or development.
Public relays still report their traffic and metrics to your dashboard; they
just don't require your API key to connect.
## Recommended setup
For production, deploy at least two relays in different geographic regions. If one relay becomes unreachable, iroh automatically falls back to the next one in your list, so your peers will still find each other.
Each relay handles up to 60,000 concurrent connections. For larger deployments, [contact us](mailto:support@iroh.computer) to increase relay capacity.
## Support
Relay status and metrics are available in your project dashboard under **Relays**. On the Pro plan, we offer priority support. [Contact us](mailto:support@iroh.computer) for Enterprise SLAs.