- API reference: Swift API docs
- Example app: hello-iroh-ffi, a SwiftUI demo that streams live positions between two devices
- All languages: platform support matrix
Endpoint and prints its endpoint id.
Prerequisites
- macOS with Xcode 16 or newer
- A free Apple Developer account if you want to run on a physical device
1. Create a new Xcode project
Open Xcode → File → New → Project… Choose the Multiplatform → App template if you want one target that runs on iOS and macOS, or the iOS-only App template if you only care about iPhone. Fill in the product details. Use SwiftUI for the interface and Swift for the language.2. Add iroh as a Swift Package
In Xcode, select your project in the navigator and go to File → Add Package Dependencies… Paste the iroh-ffi GitHub URL into the search bar: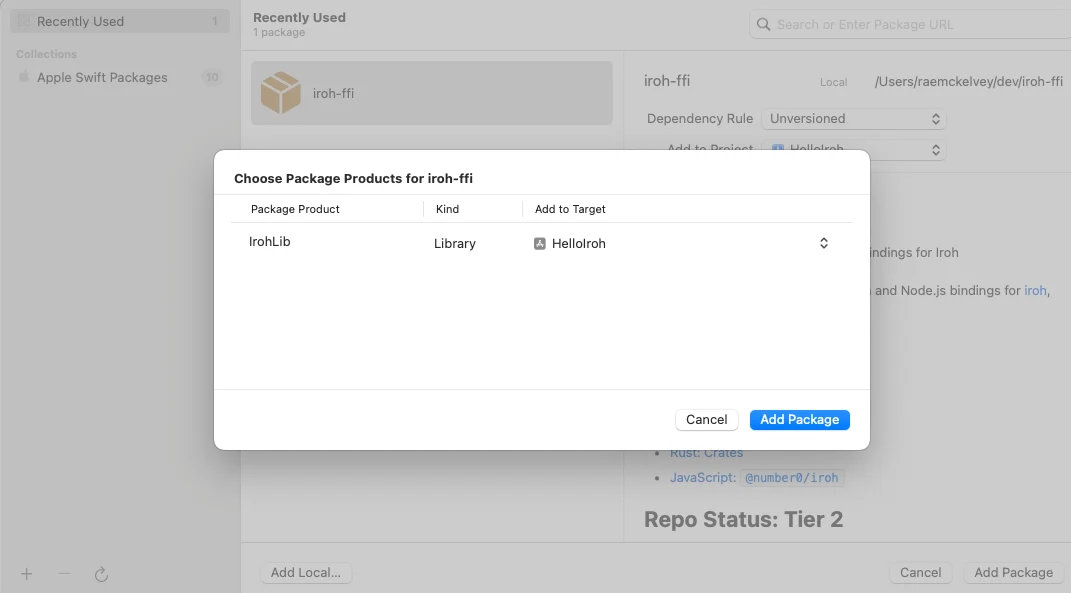
3. Link Network.framework on iOS
iroh’s Rust core uses Network.framework for interface enumeration on iOS. Add a linker flag scoped to iOS: Select the app target → Build Settings → search Other Linker Flags → add-framework Network to the iphoneos and iphonesimulator SDK rows.
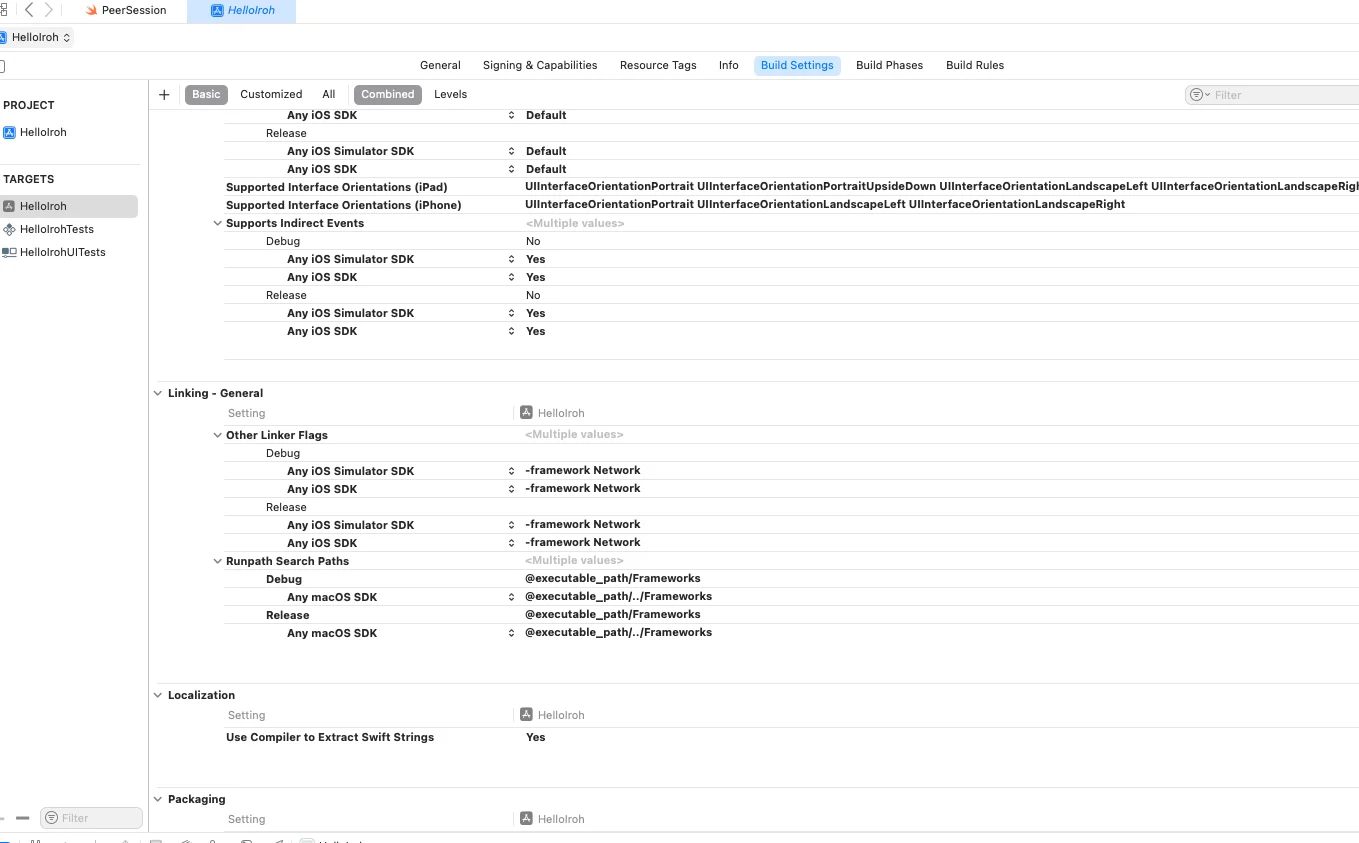
Undefined symbols: _nw_interface_get_index.
4. Grant network entitlements (macOS)
If you target macOS, the App Sandbox blocks both inbound and outbound networking by default. Open the target’s Signing & Capabilities tab. Under App Sandbox check Incoming Connections (Server) and Outgoing Connections (Client).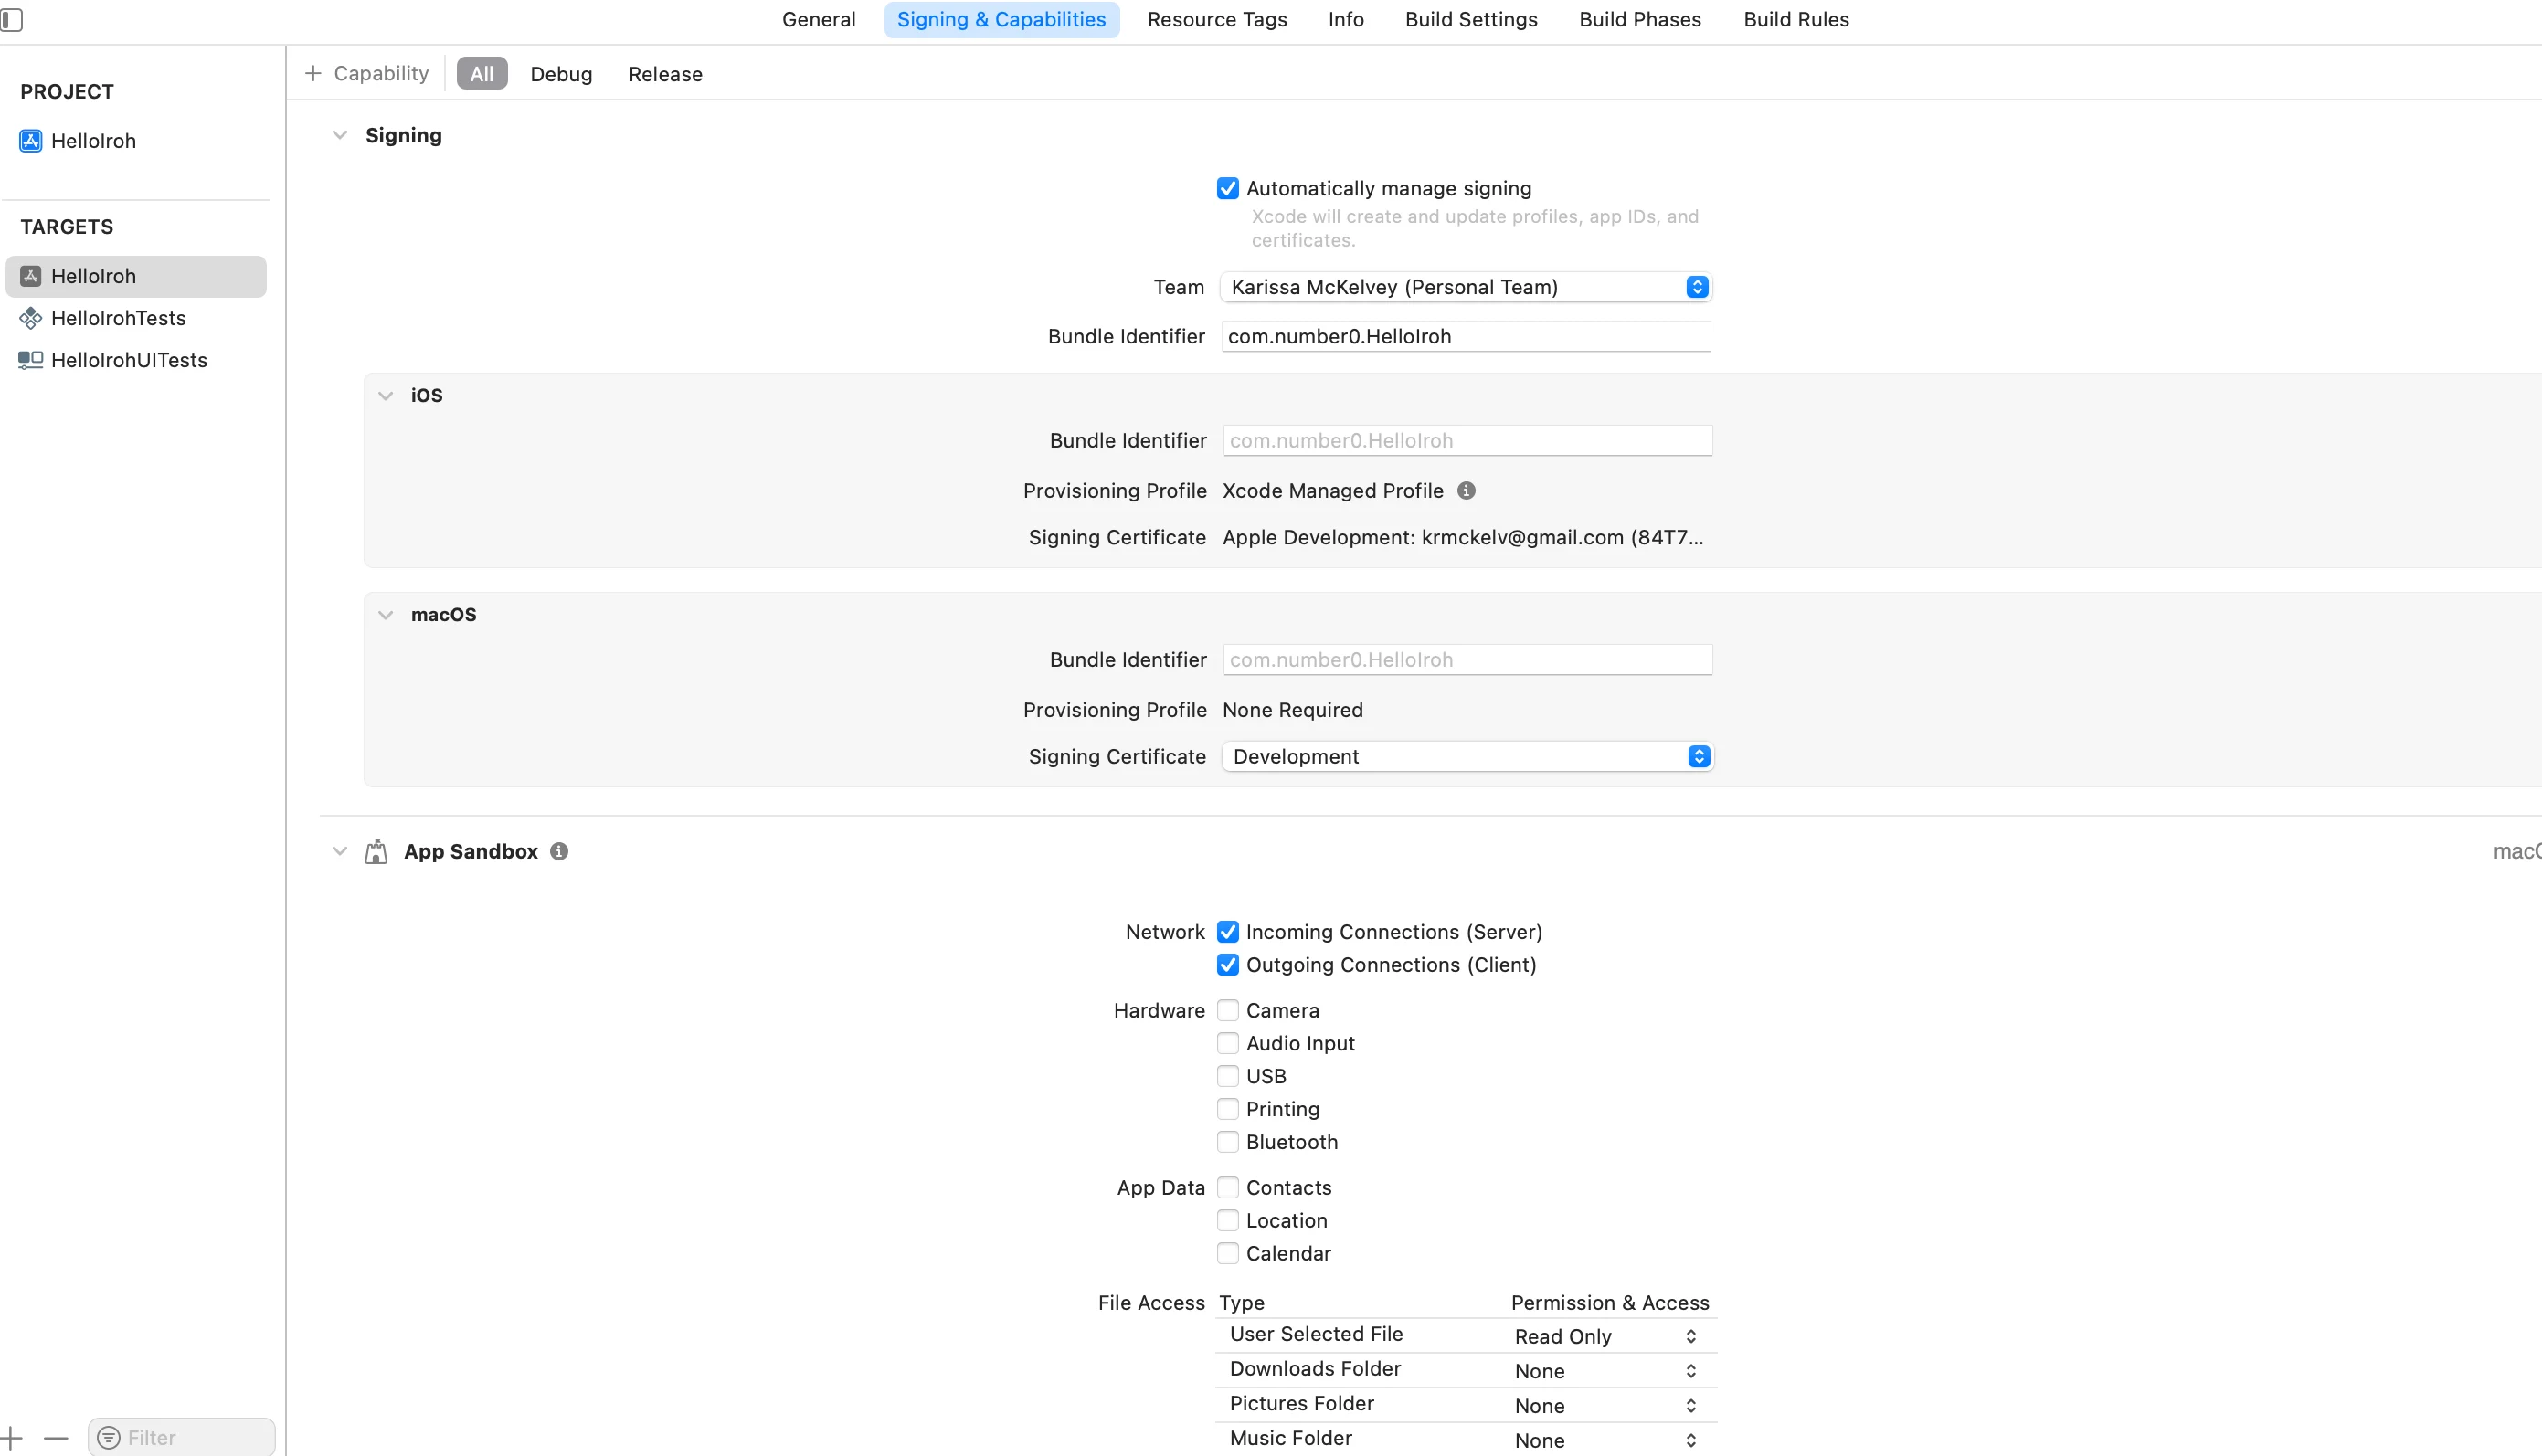
.entitlements file should now contain:
5. Disable previews (Xcode 16 workaround)
Xcode 16’s preview pipeline tries to linkSwiftUICore.framework directly when a Swift Package is in the graph, which fails with “product being built is not an allowed client of it”. Until Apple ships a fix, turn previews off for the app target:
Build Settings → search Enable Previews → set both Debug and Release to No.
You’ll lose Xcode’s preview canvas, but the app builds and runs normally.
6. Hello, iroh
ReplaceContentView.swift with a small SwiftUI view that binds an endpoint on appear and renders its id:
n0 preset (public discovery + default relays), advertises a single ALPN, and surfaces the 64-character hex id once binding completes.
7. Build and run
Pick a destination and hit Run.- macOS: choose My Mac. The app window opens and shows the endpoint id within a beat.
- iOS Simulator: choose any iPhone simulator destination.
- iOS device: select your device. You’ll need to trust your developer certificate in Settings → General → VPN & Device Management the first time.
SecretKey. If you want a stable identity across launches, persist endpoint.secretKey().toBytes() (e.g. in UserDefaults for a demo, Keychain for production) and pass it back via EndpointOptions(secretKey: ...) on subsequent launches.
Building against an unreleased iroh-ffi
If you need an unreleased fix or want to hack on the bindings themselves, you can build the xcframework locally and consume the package from a local checkout.iroh-ffi directory. The rest of the steps above still apply.
Next steps
Connect two endpoints
Build a ping over iroh and learn how tickets, ALPNs, and routers fit together.
hello-iroh-ffi example app
A full working SwiftUI demo: two devices stream live positions to each other at 60 Hz and show whether the connection is direct or relayed.
Swift API reference
Full DocC reference for
IrohLib: every type, method, and option generated from the bindings.Endpoints
Learn what an endpoint actually is and how its identity, addresses, and discovery interact.
Tickets
Understand the copy-pasteable strings that let two endpoints find each other.
Troubleshooting
Undefined symbols: _nw_interface_get_index on iOS. You skipped step 3. Add -framework Network to Other Linker Flags for the iOS SDKs.
product being built is not an allowed client of SwiftUICore. You skipped step 5. Set Enable Previews to No.
No such module 'IrohLib'. The package didn’t resolve. Pull down the package from File → Packages → Reset Package Caches and try the resolve again.
bind failed: NoNetwork or hang on macOS. Check Signing & Capabilities: both Incoming and Outgoing network sandbox boxes need to be checked.
The developer disk image could not be mounted on this device. Your device is running a newer iOS than your Xcode supports. Update Xcode (App Store for stable, developer.apple.com for betas) so the matching Developer Disk Image is available, or fall back to the simulator while you wait.